In this chapter we will see, how to use selection lists to choose a value from a list box.
Sales Dialog Without Selection Lists
Open M4 Back Office and select "Salespersons". Click on "Add New Salesperson". Rick click on the "Salesperson 1" item and choose "Add new Sale".
The "Sale 1" dialog needs still to be improved:
- Instead of writing for each sale a product description, we want to select the product from a product list.
-
The field "ClientsM4ID" is a GUID - a 36 character unique ID (e.g. "b85a8477-dc79-4cde-b7fd-6b24bf6ae7b8").
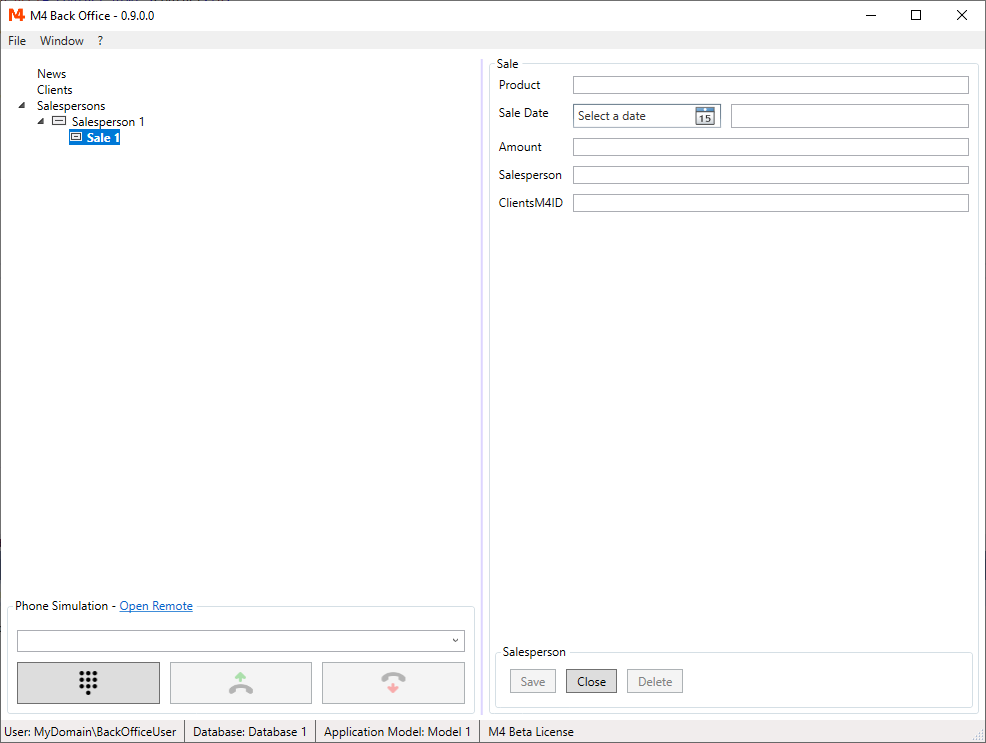
For sure, you also don't want to add this manually. Here we also need a list to select a client from. - "Sales" is now assigned to "Salespersons" by the "SalespersonsM4ID". This field is not visible, as M4ID fields of parent tables are hidden. The field "Salesperson" we created before, is not needed anymore. So we can remove it from this dialog.
Adding Products Selection List
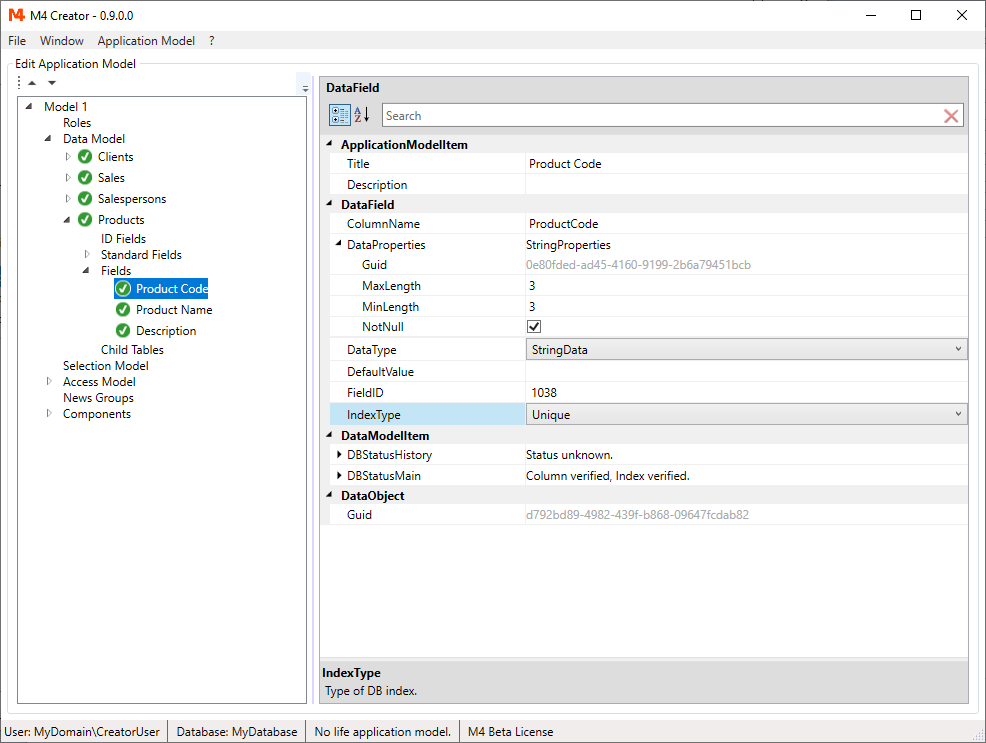
Create the table "Products" and add the fields "ProductCode", "ProductName" and "Description".
The "ProductCode" is the value we will write later to the "Sales" table.
As it will be used as a Product ID, we make is not nullable and we set a unique index, so we can be sure not to have the same value twice.
Let's assume, that we also want the code to be always 3 characters long. So we set MinLength and MaxLength to 3.
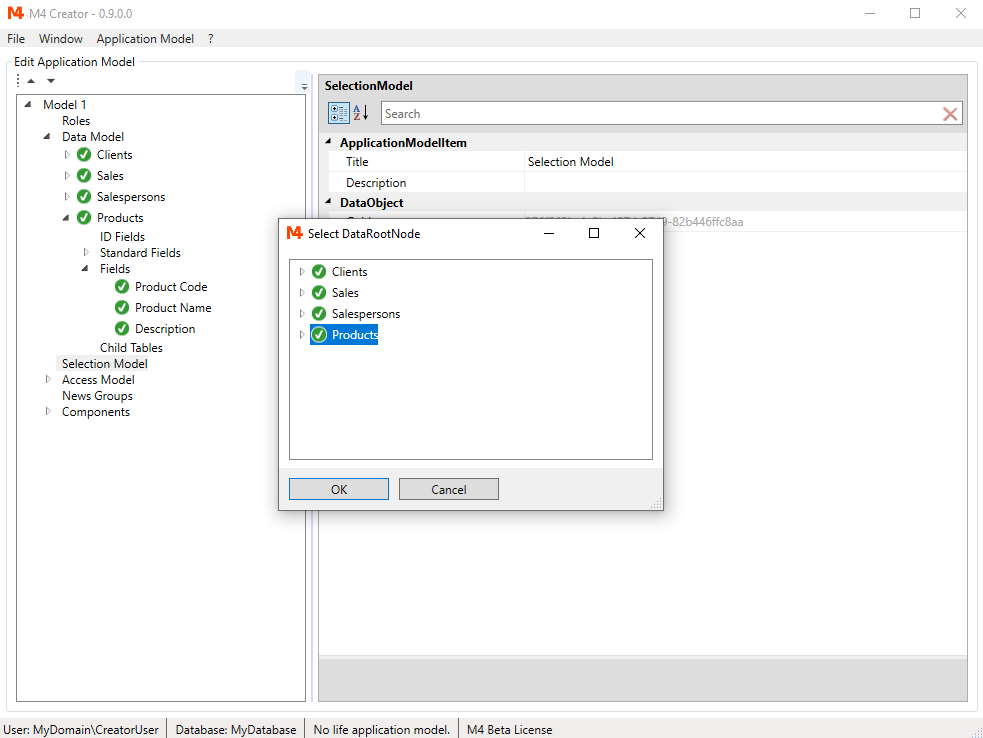
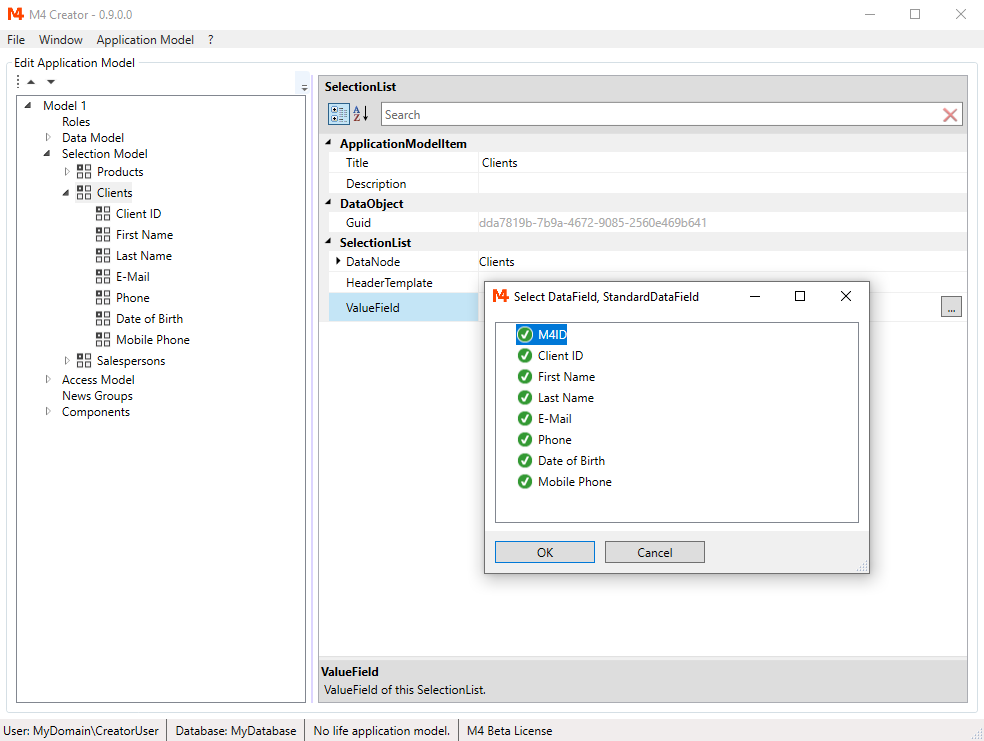
Now right click on the "Selection Model" item and choose "Add Selection List". Select the "Products" table from the dialog.
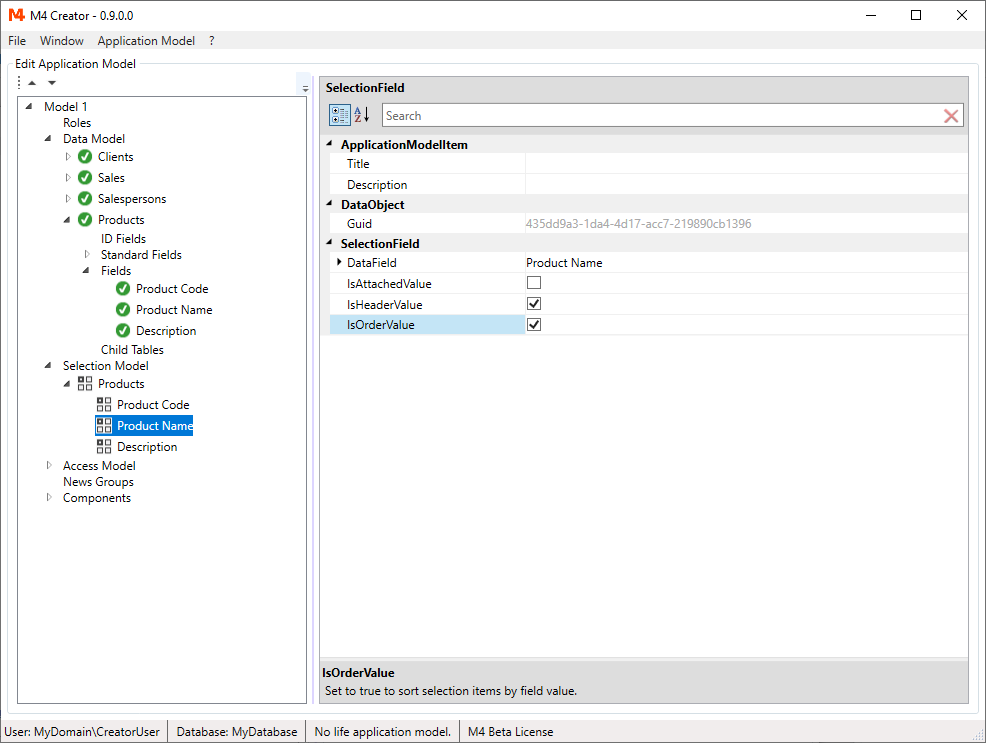
Open the "Products" selection list and then the field "Product Name". Check IsHeaderField to show the "Product Name" in the list box. Check IsOrderField to order the list box items by "Product Name".
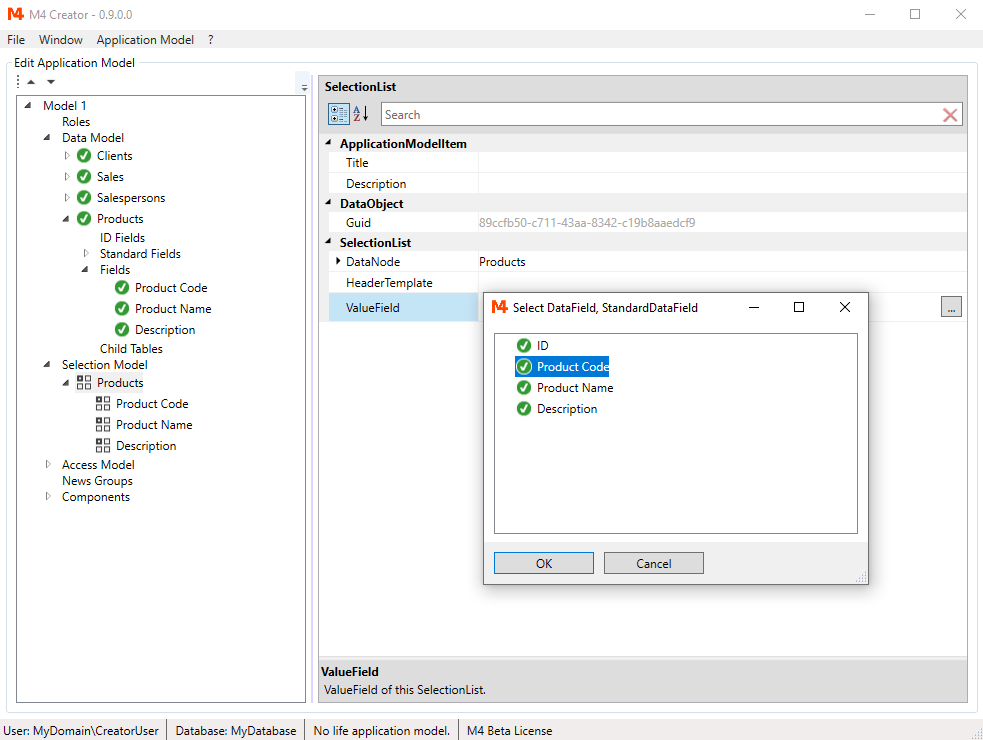
Select the "Products" selection list and go to the property ValueField. Click on "..." to select a value field. Choose "ProductCode" from the dialog.
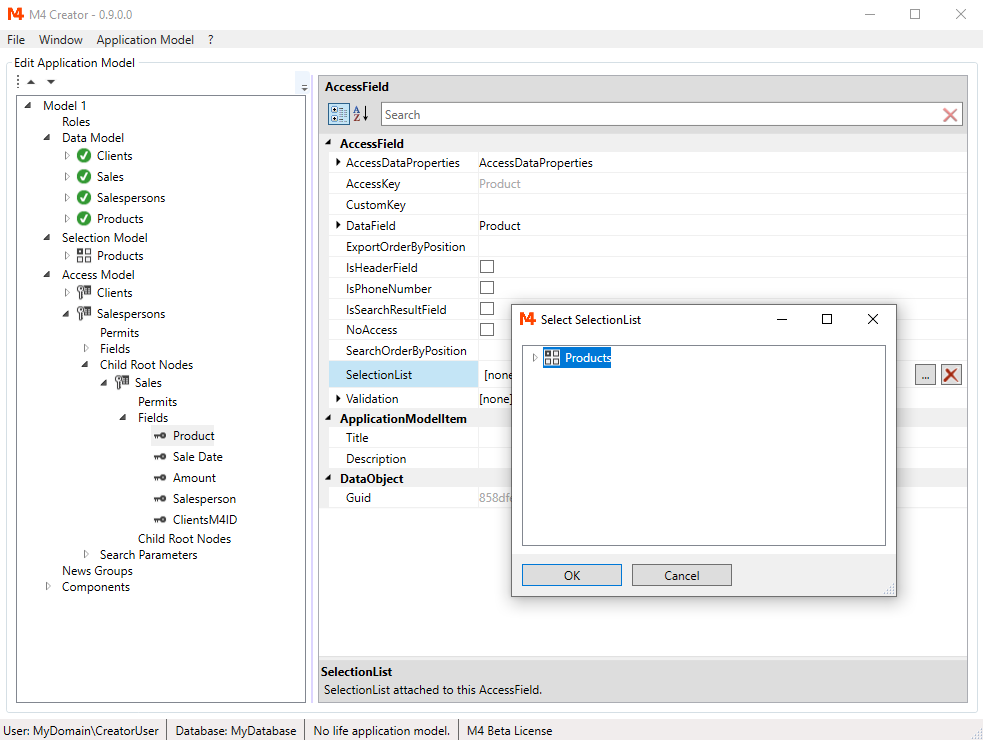
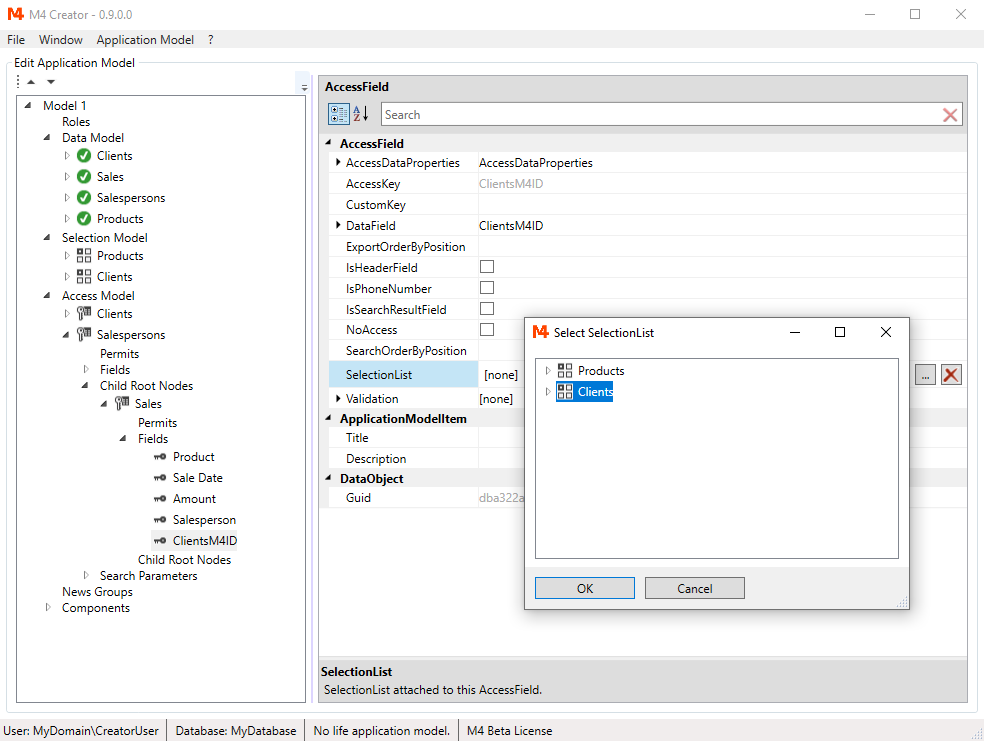
Now go to Salespersons/Sales/Product field in the "Access Model". Select the SelectionList property and click on "..." to select a SelectionList. Choose "Products" from the dialog.
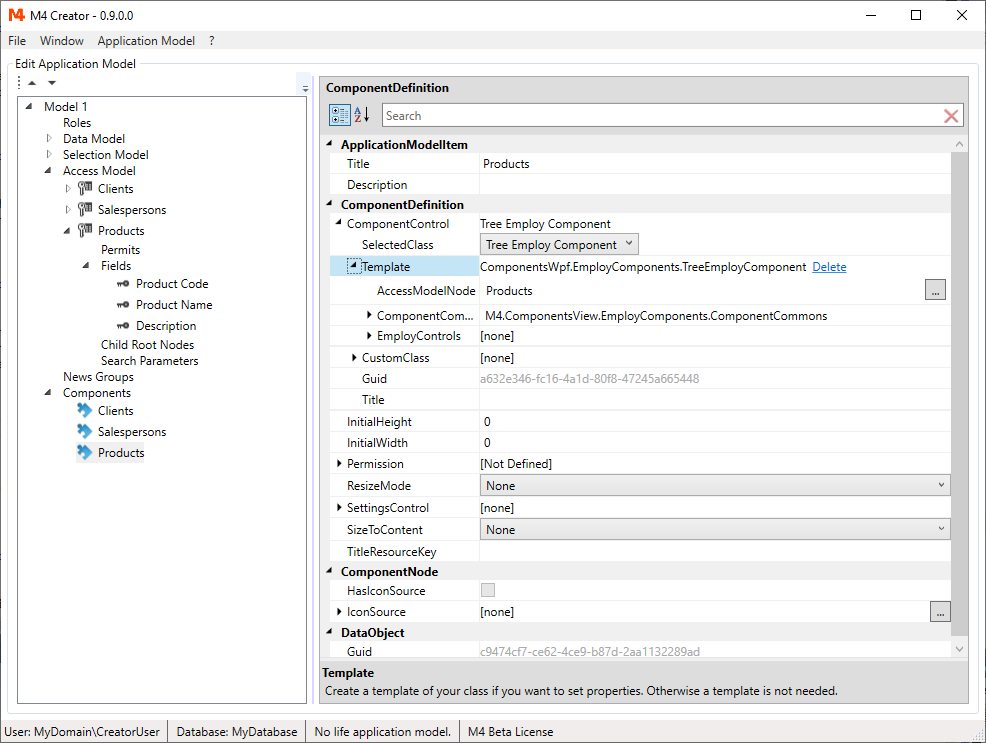
Its nice to have a products SelectionList, but we still need to add products to the list. To do this, we first have to add the products table to the "Access Model". Check IsHeaderField and IsSearchResultField for "Product Code" and "Product Name". Now create a new "Products" component on the "Products" AccessModelNode.
Adding Clients Selection List
Add "Clients" to the "Selection Model". Check IsHeaderField and IsOrderField for "First Name" and "Last Name". Set "M4ID" as ValueField.
Go to Salespersons/Sales/M4ClientID field in the "Access Model".
Select the SelectionList property and click on "..." to select a SelectionList.
Choose "Clients" from the dialog.
Open the DataField property and set the title to "Client".
Delete Salesperson Field And See Result In M4 Back Office
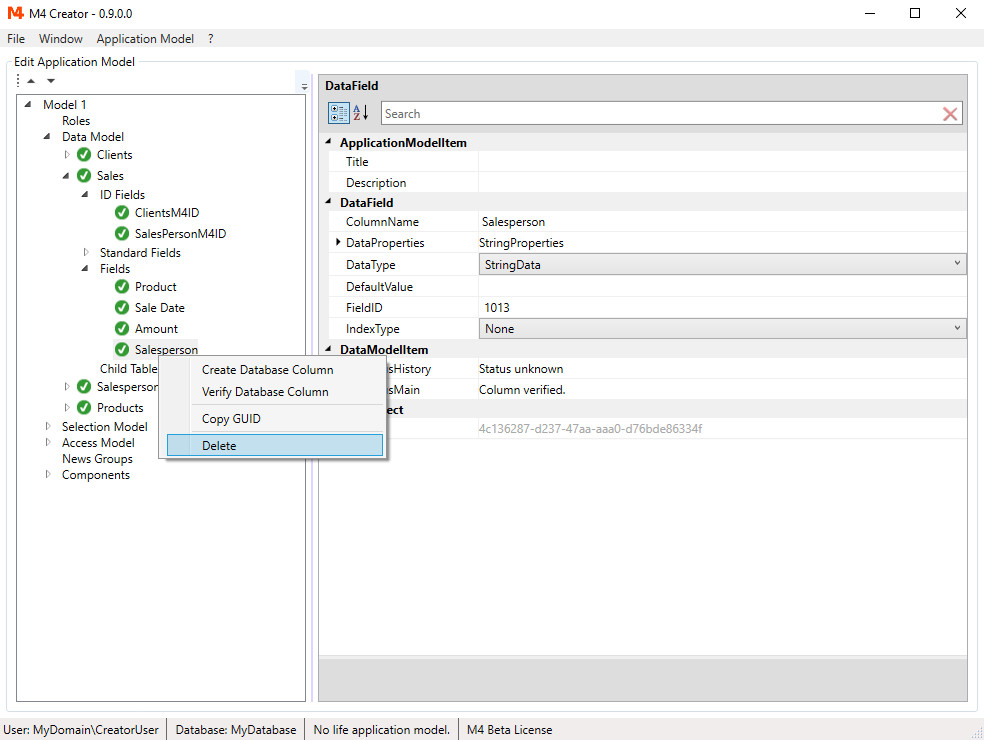
As mentioned we don't need the "Salesperson" field in the "Sales" table anymore as the salesperson is now assigned by the field "SalesPersonM4ID". Select the "Salesperson" field and delete it.
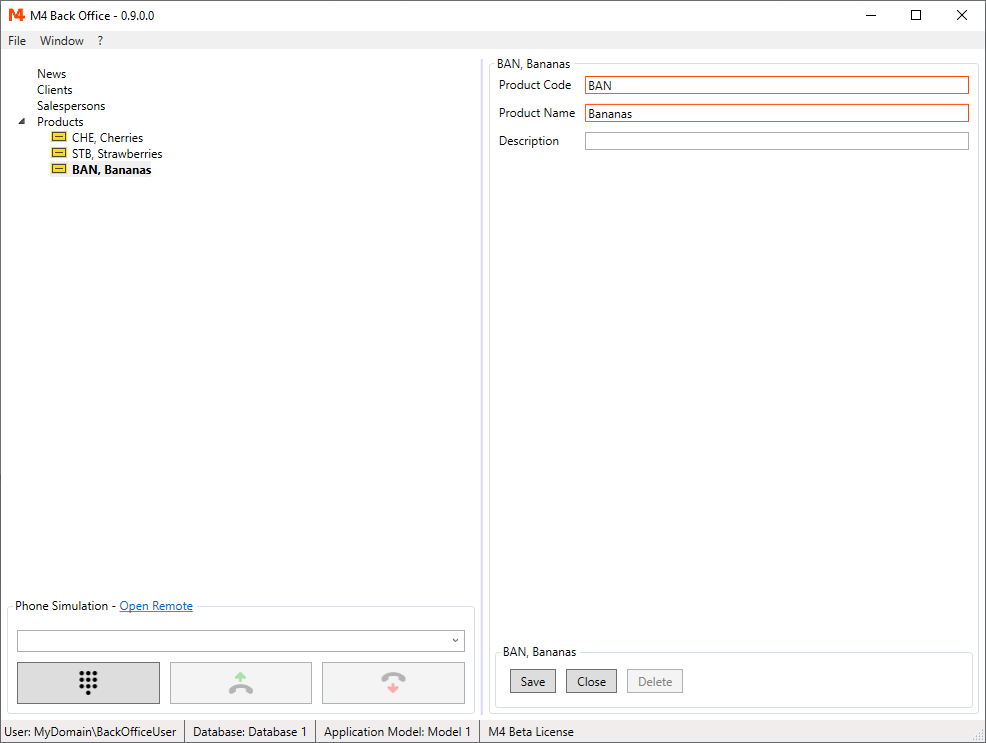
Open M4 Back Office and select the "Products" component. Add some products. In our example we will use fruits as products. Save all.
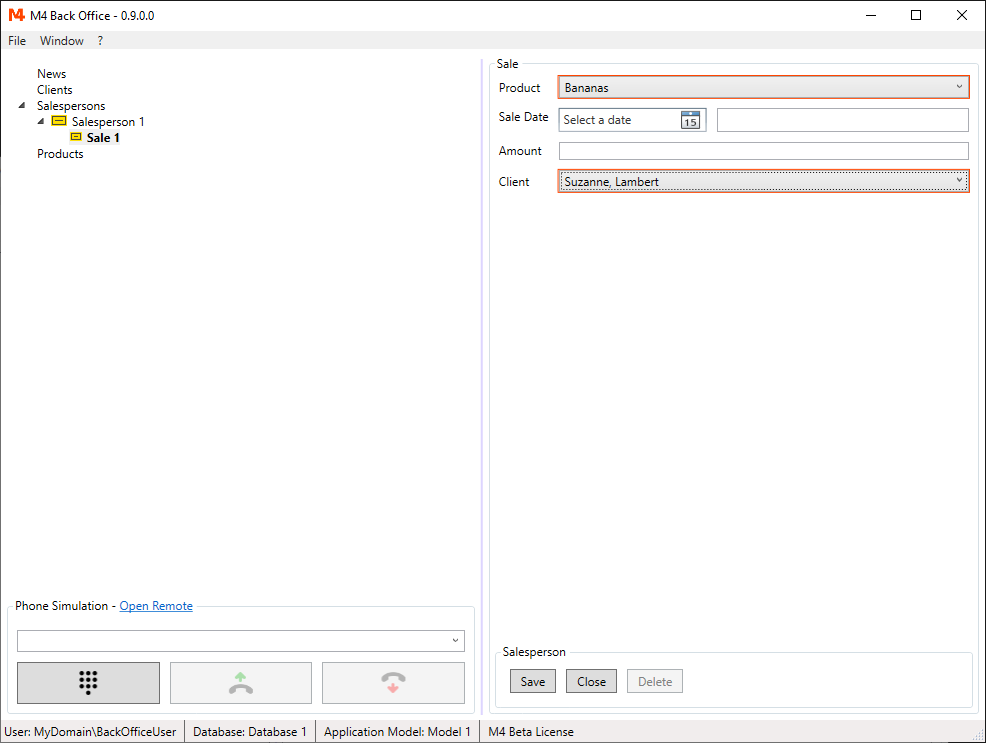
Add a new "Salesperson" and then a new "Sale".
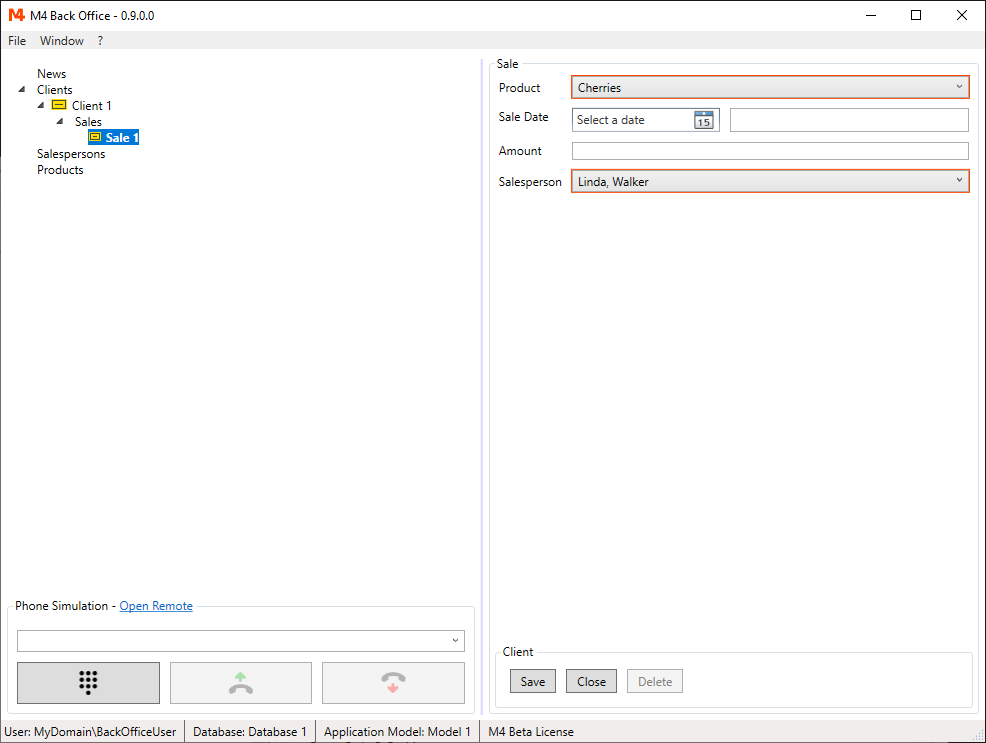
Now you can select Client and product from a list box.
If you go to the "Clients" component and add a new client and then a new sale, you still see a dialog without list boxes.
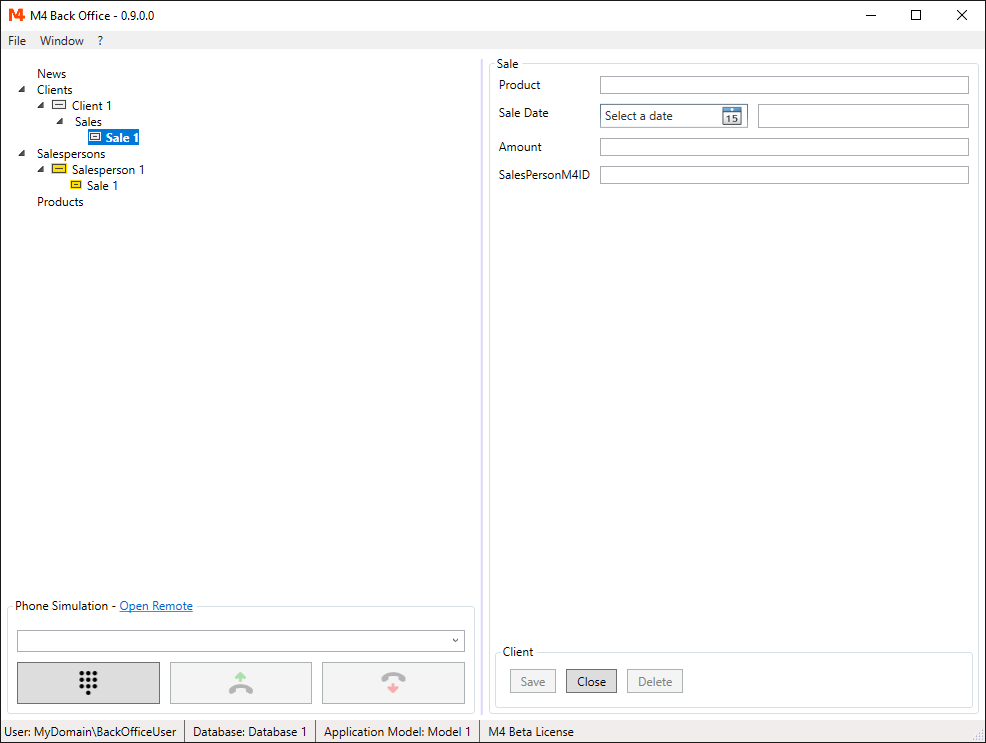
The steps to get list boxes here as well, are very similar to the ones we just did for "Salespersons/Sales".
The product SelectionList already exists and can be used here again.
Now you need to add a "Salesperson" SelectionList.
The value field here is also M4ID.
Use this list for the "SalespersonM4ID" field.
Change the DataNode title of this field to "Salesperson".
After restarting M4 Back Office you can select client and product from a list box.